Pages

Friday, December 29, 2017

Butterflies on Lace, and Quilting

 Welcome

I was going through a dollar bag of 'bits' that I picked up at a craft display and sales day some months ago, and came across this snippet of (machine made) lace. I trimmed and tidied it up and made it the center piece of this card.


The purple card was embossed with a We R Memory Keepers geometric folder.
The butterflies were cut with a M/B Pippi Die from snippets of pink glitter card


The card was finished with a fish-tail banner with the greeting heat embossed on it, 
and a piece of pink ribbon under it. 


I am linking this to:


Sunday, December 24, 2017

Star Christmas

Welcome

As this is my last post before Christmas, I am taking this time to wish all those who follow my blog a very happy and blessed Christmas and all the best for 2018.


This is the Christmas card I mass produced this year, using this sweet Nativity stamp from Kiwistamping, it is an old stamp, one of my original Christmas ones!


It was stamped on the inside of the card, behind the star shaped aperture, and painted with Twinkling H2O's


The Double Stitched Star die is from Our Daily Bread Designs, and I sponged the edges with Memento  Delicata Golden Glitz ink .  Now I have a pile of stitched star die cuts waiting to be used!!


The greeting was stamped in Memento Lady Bug red using one of the stamps from the Our Daily Bread Designs set  Christmas Flourished Verses.

I am linking this to:


Friday, December 22, 2017

Santa's Got The Blues

Welcome

This card was a commissioned  for a youngster "who loves blue!"


The image was compliments of Mr G**gle .  After printing, I painted the tree blue using iridescent medium and blue acrylic paint, and the ornaments, Rudolph and santa using a mix of sparkle pens and sparkling H2O's


I fun flocked Santa's beard and white trim


The Sentiment is from Our Daily Bread Designs, gold embossed, as were the edges of the feature panel


I also used some blue punch waste behind the feature panel to add to the shimmer and shine


I had hoped to show several other  Christmas cards I have made, which I have been 'holding off' on until delivered, but now my computer is not playing fair (or I'm not getting it right), and I can't seem to move them out of the file they downloaded into  ... I hate to admit, but I suspect it is the latter!!

I am linking this to:


Tuesday, December 19, 2017

The Messiah Trees

 Welcome 

Just a quick post today.

As I had made a card for my grand daughter, I thought I had better be a good grandma and make one each for the boys too - they are in different families, so I could make them almost identical


Again I used a freebie graphic from Carmen at Beyond the Fringe, printed it out to size,

I embossed the edges, and added glitter glue to the centre of the 'closed' letters.


Mounted onto a red card base, I then added some washi across the bottom of the card to 'fill in the blank', and I was done.

I am listening to The Alleluia Chorus at the moment, of which the scripture above is part of the words, hence the title of my post. 

I am linking this to:


Saturday, December 16, 2017

Christmas Smarkle

Welcome

I usually mass produce my Christmas cards, but this year I received an unexpected one from my sweet granddaughter, so I made this one exclusively for her - and I have made two others for my grandsons - as they all live locally, I can't give one a card without giving to the others!


I photographed this sitting in a pile of drying, home grown lavender - this is one sure indicator to me that Christmas is imminent, picking and drying the lavender.  The plant(s) I have go right back to before I was born (and that's a few years now....) They are cuttings from one my mother had in her garden, that was 'inherited' from her mother-in-law, and I suspect was already in the garden when they (my grandparents) bought the house.  The house goes back to 1904, or there abouts.!!


The image is a freebie from Carmen's blog,  Beyond The Fringe, which I sized and printed out, coloured with chalk and fussy cut before adhering to the base layer of  glitter card.
The sentiment was from a magazine set of stamps, and was gold embossed, before being cut to a double fishtailed banner


After assembling the card I added clear Kindy Glitz to the wings for even more sparkle.  For a pink, purple and sparkle lover, I am sure this will be acceptable!! 😊💖😊

I am linking this to:

The gardens are DONE, the curtains are DONE and I am going to craft for the next few days....


Wednesday, December 13, 2017

Something Scenic - and Fishy

Welcome

I enjoyed making this card  for a fisherman - not sure if he was a saltwater or freshwater fisher, but he got a trout themed card ...  


The featured stamp is by Hasting Rubber Stamps - a New Zealand company, and it shows several stylized iconic N.Z. items. The ferns, the Manuka (the wee pink flowers) and the way the weed in the foreground is curled is a typical Maori motif.  The mountain portrayed is Mt Cook-Aoraki, New's Zealand's highest peak.


I mounted the pencil coloured feature panel over some torn corrugated card, that I had rubbed copper Inka Gold paste on. The side was left plain to stamp and emboss the sentiment, another stamp by a N.Z. company, Montarga 


The card base is a forest Green, and I layered a deep maroon piece of a thick mulberry paper behind the cardboard.  I was really happy with the outcome of this card.

I am linking this to:


It's good to be back again - and I think I may be a bit more active in the bloggy world as the gardens are gradually coming under control, and now I am starting in on curtains etc...  things that did not get done last year are finally getting caught up on.


Wednesday, December 6, 2017

Wild Roses at Through The Craftroom Door

Welcome

I am honoured to have the Guest Designer position over at Through The Craftroom Door this week.
Their sponsor is Sheepski Designs, and I chose the Wild Rose image to work with.


I printed out two copies of the image, and fully coloured one, and partially coloured the other using Faber-Castell Polychromo pencils.  The background on the fully coloured image was lightly  coloured with a blue pencil using the side of the lead, rather than the tip.


I trimmed out the elements I had coloured on the partially coloured image, shaped them using a ball stylus on a mouse pad, and glued them over the full images, giving just a hint of dimension.


I finished the feature panel by applying several coats of clear Wink of Stella, unfortunately the camera did not pick up the sparkle.


The sentiment, from Kiwistamping, a local (N.Z.) business, was embossed in gold in the bottom right corner of the card base, I then added trimmed down doily (I have had these over 10 years, I think they are meant for a small plate!) and adhered the feature panel over that


A few Kaisercraft flatback pearls were the finishing touch.

I am linking this to:


Hopefully I will be able to get around and visit soon - it is so hot here that I am gardening first thing in the mornings, and staying inside the rest of the day!!


Wednesday, November 29, 2017

I'm Back - With a Dreamy Birthday

Welcome

I would especially like to welcome Mia and Joanne who are new followers.  I would love to follow you back, but I cannot find a link to any blog - please let me know in the comments if you have one.

Edit : Mia has contacted me, and this is the link to her blog - please pop over and welcome her.

A big thank you to all who commented on my last post - I simply needed time out to sort out the myriad of tasks that arrive when you are on your own - like removing hedges, painting fences, organising maintenance and repairs on the house etc.  Life is vaguely under more control now.

 I have also come to the decision that I may not be able to visit everyone as much as I did, (at least not until after the end of summer when the gardens etc do not need so much attention).  I was starting to stress over not keeping up the visits to you all, but I am sure you will understand if  I am not so frequent in my comments.

I have been crafting some while 'away' - not as much as I may like, and I have yet to make my Christmas cards, although I do have a 'plan' in mind....

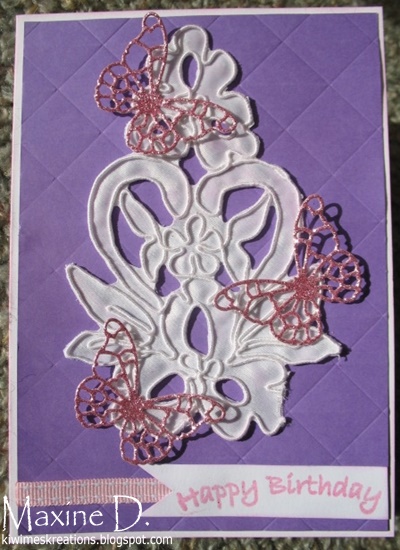
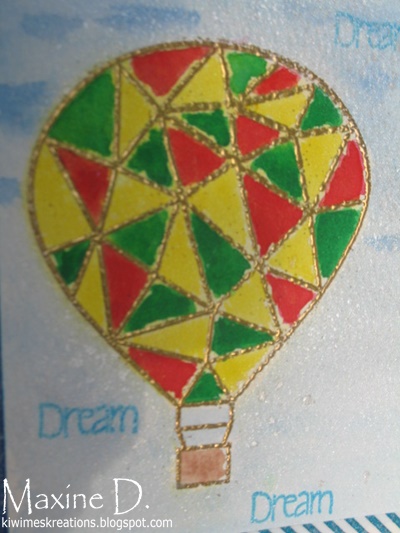
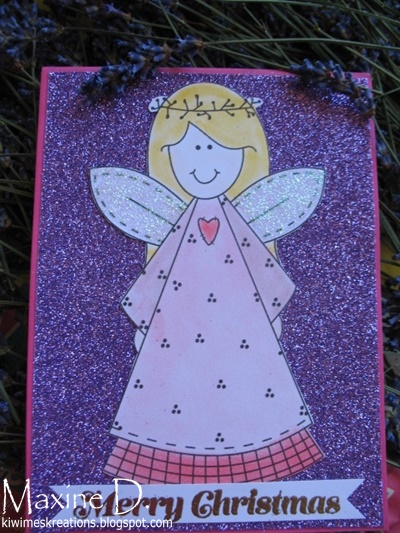
Today's card was made for a young man on the cusp of adulthood.


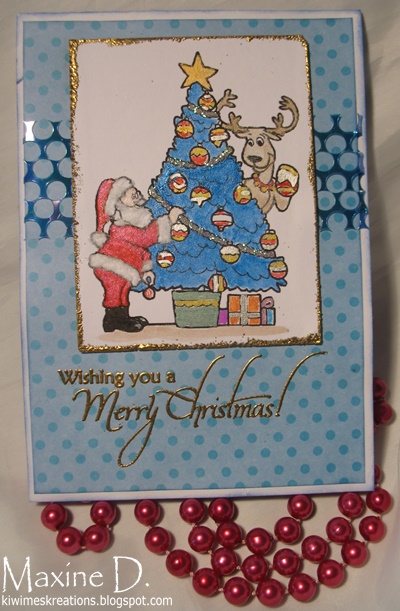
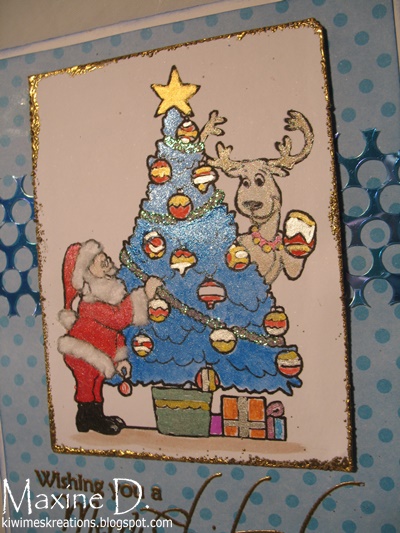
I stamped and embossed the balloon image (from Krumspring Stamps, now in recess) and then filled in the design with watercolour paints. I then masked the image and applied some silver spray, which can just be seen in the above picture.


I the background was loosely watercoloured, and then I randomly stamped the word Dream over it.


The base of the card was covered with two strips of washi tape, and the sentiment added on top of that. The words all came from a set of Hampton Arts Colour Me  series of stamps.

I am linking this to:

Thank you for visiting, and for all your support!!


Friday, November 3, 2017

Time Out

Hi folks

Just to let you know that I am taking a bit of time out for some self care - life has sort of snuck up on me and I need some breathing space.

I will be back !!

Thank you all for your amazing support over the past year.

Take care 'til then.


Wednesday, November 1, 2017

Scrappy Stripes

Welcome

I made this card for a couple who have been through a very difficult time recently.


I started with the base panel, which had been made some time ago using snippets of paper and gluing them to a card layer sized base - this can be done over some of those oops pieces that sometime occur - at least they do in my studio!!

I decided to emboss that layer before anything else, and as is so often the case, the embossing folder was a tad shorter than my base, so to overcome that, I tied the silver cord around the blank areas, which takes the eye off the lack of embossing.


I stamped the scripture on a snippet of blue card, that matches the partial layer behind the main one, and die cut it with a M.B stitched die
I tried mounting it on blue sparkle card, but it looked flat, so then tried the pink and it worked!


The final detail was a couple of strips of bling in the corner.


I am linking this to:


Monday, October 30, 2017

Cheerful Daisy Birthday

Welcome

This is a brightly coloured card for a very special person who brightens up my life with lots of laughter.


The background was made using the negative images left in a piece of card that I had cut out numerous leave sprays from, as a stencil.


I decided to go with a shaker element on the card, and die cut my polaroid frame for that out of bright yellow.


I then decorated the finished shaker element with a layered flower and a die cut to match the stenciled background, and a layered birthday sentiment in the opposite corner.


I used a layer of card on the inside, simply sponged on the edges, to give the card added stability from the weight on the front with the shaker element.

I am linking this to:


Friday, October 27, 2017

A Tinned Birthday

Welcome

A while ago I saw a packed and decorated tin when visiting Carol G's blog, and decided that I would do likewise.


The basic idea is to get a tag top tin, and instead of opening it from the tag, turn it over and cut open the bottom about 2/3 the way around - empty, clean and when dry decorate the outside. 

I used patterned paper, measuring carefully to get the width, and allowing some overlap on the length.

I also cut a piece of paper for the top, and winged it to make some extra shaping around the tag area so the paper fitted around and under the tear tag.  I then attached some fuzzy yarn through the tag, and tied them with a wee piece of gold edged ribbon.

Once the decoration has been finished, put the gift in the tin and seal the bottom using a hot glue gun, and the cover the irregularities (i.e. messy bottom) with a circle of felt or card.

I did have some photos of the top of this, but the computer has eaten them!!


I made a matching gift tag to go with the tin to put my personal greeting on.
  

I added a flower made from the same materials and dies as those on the tin label, but forgot to sponge the largest layer  before I took it out of the die, so swiped the ink pad directly on it - I love the texture it gave to the leaves.

I am linking this to:

(Ribbon, Free and Pink)