Pages

Monday, July 28, 2014

Pin Pricked Pear

Welcome

I love this image, it is one of my oldest, by Rubadubadoo, and I have really had my money's worth out of it!
I stamped on the rear of this piece of watercolour paper, and pinpricked it.


I then turned it over and coloured the panel with watercolour crayons


I ran the edges of the image panel over a Memento Blue Danube ink pad, before mounting it on some card - it is a creamy colour with a grey fleck as it is made from recycled materials. I also sponged the edges of this card with the blue ink.


The final detail was some blue bakers twine and a button, and the sentiment, also in blue.

I am linking this to:


Thank you for visiting - any comments you may leave are deeply appreciated.
May your day be blessed.

Saturday, July 26, 2014

Simple Green Sympathy

Welcome

I am sharing a simple sympathy card I have made.


The patterned paper is from a RAK, the feathers a Couture Creation die cut, embossed and sponged with gold ink.


The base of the feathers had a wee gold bow added.


The sentiment was embossed with gold, and the edges faux stitched with piercing and a gold pen.


A simple card for a solemn occasion

I am linking this to:

Thank you for visiting - any comments you may leave are deeply appreciated
May your day be blessed.


Thursday, July 24, 2014

Win a Shopping Spree!

Welcome

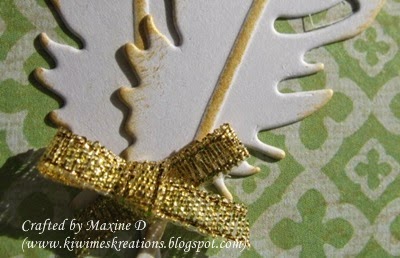
I'm afraid life has kept me busy and out of the studio of late - and I am missing it, so I decided to share this with you instead of my usual cards.

This is a direct 'cut and paste' from the facebook page

Win a $100 Shopping SPREE!

 LOOK AT THIS!
 
Absolutely amazing news from Just for Fun Rubber Stamps!  It's a win/win - $100 in stamps for one lucky winner AND it ships for free!!!  WOW!!!! ♥

 
It's time for a contest! 
 Would you like to win a $100.00 shopping spree 
at Just For Fun Rubber Stamps...
AND 
have it ship for free????
 
 
Right now JFF has 623 followers on our Facebook Page. We'd like to kick that up a notch ~ our goal is 1,000 followers by the ...end of August so here's what we'd like you to do....

Spread the news and tell us about it. Post a link to our Facebook page -https://www.facebook.com/justforfunrubberstamps and encourage everyone to like JFF Rubber Stamps. Be sure to visit our Facebook page (contest thread) telling us where you posted it so you will be entered (1 entry).   If you post it multiple places, post a second time in the contest thread and send us a link to that post (2nd entry).   AND   If one of your friends likes us and tells us you sent them, we'll give you another entry!! (3rd entry) Remember, they have to like us and post about it right here to count!
 
We'll be keeping track of all the likes and as soon as we hit 1,000 Likes we'll give away a $100.00 shopping spree - and don't forget free shipping too! 

What are you waiting for...
Go spread the word
 and 
remember to come back and tell us about it!!!
 
All the best - and thanks for visiting.
May your day be blessed.

Saturday, July 19, 2014

Arrows

 Welcome

I have made another card using the same Close To My Heart set that has the feather stamps.


As soon as I saw this stamp I started thinking of this design, so I had a play using various inks and some gold embossing, ensuring that the embossed arrows went in the opposite direction to the others.  This panel was mounted over a green layer.


I embossed the sentiment (an old Hero Arts Stamp) and die cut it, and then layered it. 


The background looked too plain, so I embossed it with the herringbone design, but the embossing did not quite reach to the top of the red layer of card, so I used some creativity to hide it by using twine and a button with a double bow.


Thank you for visiting - any comments you may leave are deeply appreciated.
May your day be blessed.

Thursday, July 17, 2014

Flowers, a Bee and Paper Lace

Welcome.

After making several Z-fold cards recently, I thought I would try a variation on the theme.


 I made this an upright fold, and used three small (Couture Creation) dies to create the swing panels


I used two different stamps on the panels - a retired Layers of Color flower, 


and an unknown bee (very old, it is one of my originals).


The paper on the back edge is part of a page from a Rosie's 6x6 pad called 
Far Away Land.


The lace on the left hand side is a self-adhesive paper lace.

Tuesday, July 15, 2014

Whimsy Fish On in Monochrome

Welcome

We have a new challenge at the CCC Digi Challenge today, and our sponsor is Whimsy Stamps. The challenge is to create a monochrome card.


I started with the fish image, and as I have been surrounded by keen fresh water fishermen for a lot of my life, I chose to colour the image to look like a rainbow trout, but added some Iridescent Blue twinkling H2O paint to it to keep to the colour I had chosen.


I then started the background, and made it by tearing blue toned paper into strips and layering them on the base - I then ran some Kindy Glitz across the tops of the 'waves', and when that was dry, I embossed the background piece.


The embossed layer was adhered to a sparkling silver layer, and I added the sentiment with some blue ribbons behind it. The fish was popped up on foam dots, and the the whole mounted onto to blue base.
I put the sentiment "Catch More Fish" on the inside, but forgot to 
photograph it.

I am linking this to:

Thank you for visiting - any comments you may leave are deeply appreciated.
May your day be blessed.

Sunday, July 13, 2014

One of a Kind

Welcome

Playing in the studio this afternoon I decided to 'christen' a set of stamps from Close To My Heart that I have had sitting on my desk for some time. As soon as I looked at them in any detail this came to mind.


I decided to use two layers to give a subtle frame to the images, which I inked up ion Rich Cocoa and Bamboo Shoot inks


After stamping I computer generated the sentiment, printed it onto vellum and gold embossed it.


When placing it, I was careful to place the word one under the contrasting feather. I held it in place with a brad and a wee touch of glue under the lettering


Before I mounted the image panel, I ran the edges of the panel across the green ink pad.
This card was made in record time (for me) and I am pleased with the outcome.

I am linking this to:


Thank you for visiting - any comments you may leave are deeply appreciated
May your day be blessed.

Saturday, July 12, 2014

Birthday Parade

Welcome

This card was made for the first birthday of a wee boy.  I started with a layer of card that I had been 'messing around' with watercolours on a while back, and embossed it with a Swiss Dots folder.


I then stamped the fun images from a retired Layers of Color set, Polka Dot Parade, onto white card, painted them and the fussy cut them.


  And placed them on  the card on a 'road' of glitter, that had been stuck onto double sided tape.


To mimic the glitter, I embossed the sentiment onto a scrap of blue card in silver, then mounted it over a layer of silver sparkling card.
The completed panel was then mounted onto an orange base.

I am linking this to:

Thank you for visiting - any comments you may leave are deeply appreciated
May your day be blessed

Thursday, July 10, 2014

Antique Baby (Image)

Welcome

I recently became a great aunt again, and I wanted to make a card for the parents of the new great-nephew.  About that time there was a gorgeous image shared over on the Graphic's Fairy Website.


I loved the image and printed it out sized to fit the card.


After trimming the print, I distressed and sponged the edge, stitched it to the next layer, then mounted it onto the blue base card.
 

I varied the the stitching as I went around the image.


I loved the greeting on the image, as the baby in question weighed in at just under 9lb.  I enjoyed making this card, and it came together in a relatively short time.  What took the longest was figuring out which card to use!

I am linking this to:

Thank you for visiting - any comments you may leave are deeply appreciated
May your day be blessed

Tuesday, July 8, 2014

Shaving Creme and Embossing

Welcome

I have been having fun with the shaving creme technique recently, and this is one result.


Before I coloured the background, I clear embossed the water colour paper, which formed a great resist, and added to the overall dimension in the card


Here is a close-up of the embossing - I coloured the shaving creme with food colourings in red, blue and yellow, swirled them a wee bit, and then dipped the paper into it.  It is a really fun technique, and you never know what the results will be.


I finished the card with a stamped image of a simple flower (an old Hero Arts Stamp), which I coloured using markers, and as the red did not stamp very well, I added some extra colour by hand later.


The card was finished with a some rhinestones on the plain strip of card.

I am linking this to:

Thank you for visiting - any comments you may leave are deeply appreciated.
May your day be blessed.

Sunday, July 6, 2014

Purple Anniversary

Welcome

I recently had the pleasure of making an anniversary card for a couple who have been married for 44 years, but I could not blog until now as my blog is followed by one of them!  


I started with the Z-folded base, cut the half heart and added the contrasting layer over it, having stamped it and smudged some gelato around the edges before removing the die.


The anniversary stamp is an old unmarked one, (one of my originals) and was embossed with green tinsel powder.


It was at this point that I got stuck, and started looking through my patterned paper to see what I had, and I discovered this page in a Rosie's pad. As keen outdoors folk, I felt this 'picnic' type image was appropriate. I trimmed it to fit and adhered it


With the remaining scrap I managed to cut the butterfly, and add the wee strip across the base of the front of the card. The pearls were the only bling on the card.


This gives so idea of the dimension this fold gives once it is stood semi opened.

I am linking this to:


Thank you for visiting - any comments you may leave are deeply appreciated.
May your day be blessed.

Thursday, July 3, 2014

A Small Boy's Racing Car

Welcome

I made this card recently for a grandson who, like any young boy, loves cars.


The background was a piece of water colouring I had been playing with some time previously.


The number circle is one designed by Cindy Close, that was given as a freebie some years ago.  It came in black and white, and I was very pleased with myself that I was able to use my print programme to colour it. (I am not a great computer whiz, and the programme is a freebie that I don't use much.)
As you can see, I added some Kindy Glitz to brighten it up.


The sentiment (a Kiwi Stamping one)was white embossed, coloured with a silver pen, then glittered. 


The car (by Wags n Whiskers) was stamped on white card and coloured with metallic pencils, then metallic pens were used to add another layer of sheen.


The driver was coloured using watercolour pens. The final detail after assembling the card was to doodle around the water coloured layer before adhering it to the creme card base that I had sponged with Tea Dye DI.
The number plate was personalised with my grandson's initials.

I am linking this to:

Thank you for visiting - any comments you may leave are deeply appreciated
May your day be blessed

Tuesday, July 1, 2014

A Lady Bug, Flowers and Embossing

Welcome

This is my second post for today. 
CCC Digi Challenge has a new challenge up - Flowers and Embossing.


 I used an image from our sponsors, Bugaboo, and painted it with Twinkling H2O's.


This was mounted on a red base, and then over an embossed white panel.


The sentiment was heat embossed one white card, and also mounted over  red, and tucked next to the floral panel.


The final detail was the ribbon, and although it was one sided I managed to get the spots showing on all the exposed (important) sides!

I enjoyed making this card and am pleased with the outcome.

I am linking this to:

Thank you for visiting - any comments you may leave are deeply appreciated
May your day be blessed.

Pink Peony

Welcome again

It is time for the next Creative Craft Cottage challenge,  the challenge is this colour and fauna palette.


I started my card with a shaving creme background, a challenge issued in a small SCS group I belong to, Stamp Addicts.


I then stamped the large peony image (a RAK from the sweet Kelly at Sandcastle Stamper) in London Fog ink and clear embossed it before colouring it using chalks.


I used cyrogen paper for the peony, which has a very subtle sparkle on it that shows through what ever colouring medium you use over it - it can just be seen in the above photo.


I then went to add some sequins, and found only two of the shape I wanted in the container of sequins that I had open - I opened five other containers I own before I found enough, and even then they are not identical!.  

To finish the card it was mounted onto a green card base.

I am linking this to:


Thank you for visiting - any comments you may leave are deeply appreciated
May your day be blessed